Skip to content
Argus Support Hub
Centre Point School International
Admissions
About
Contact
Search
parent connect
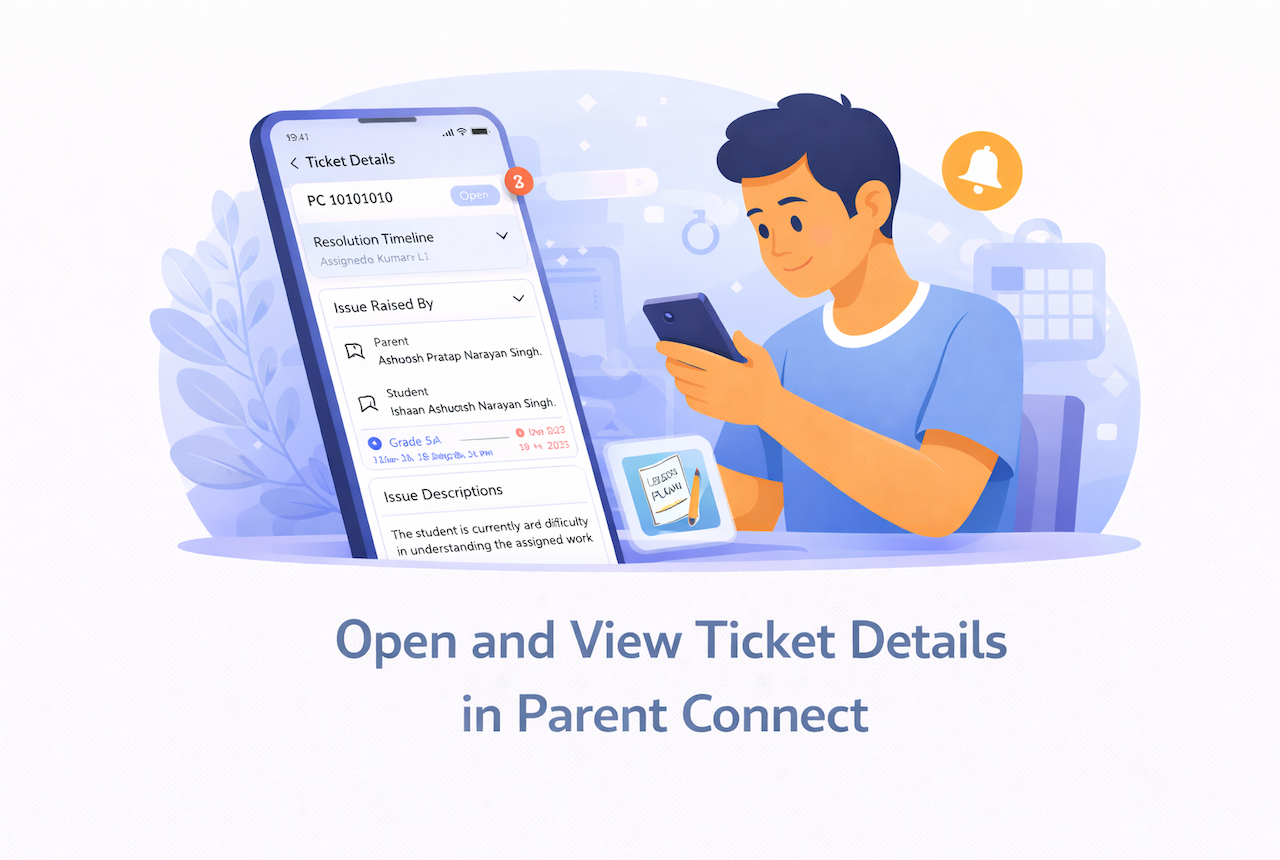
Open and view ticket details in Parent Connect
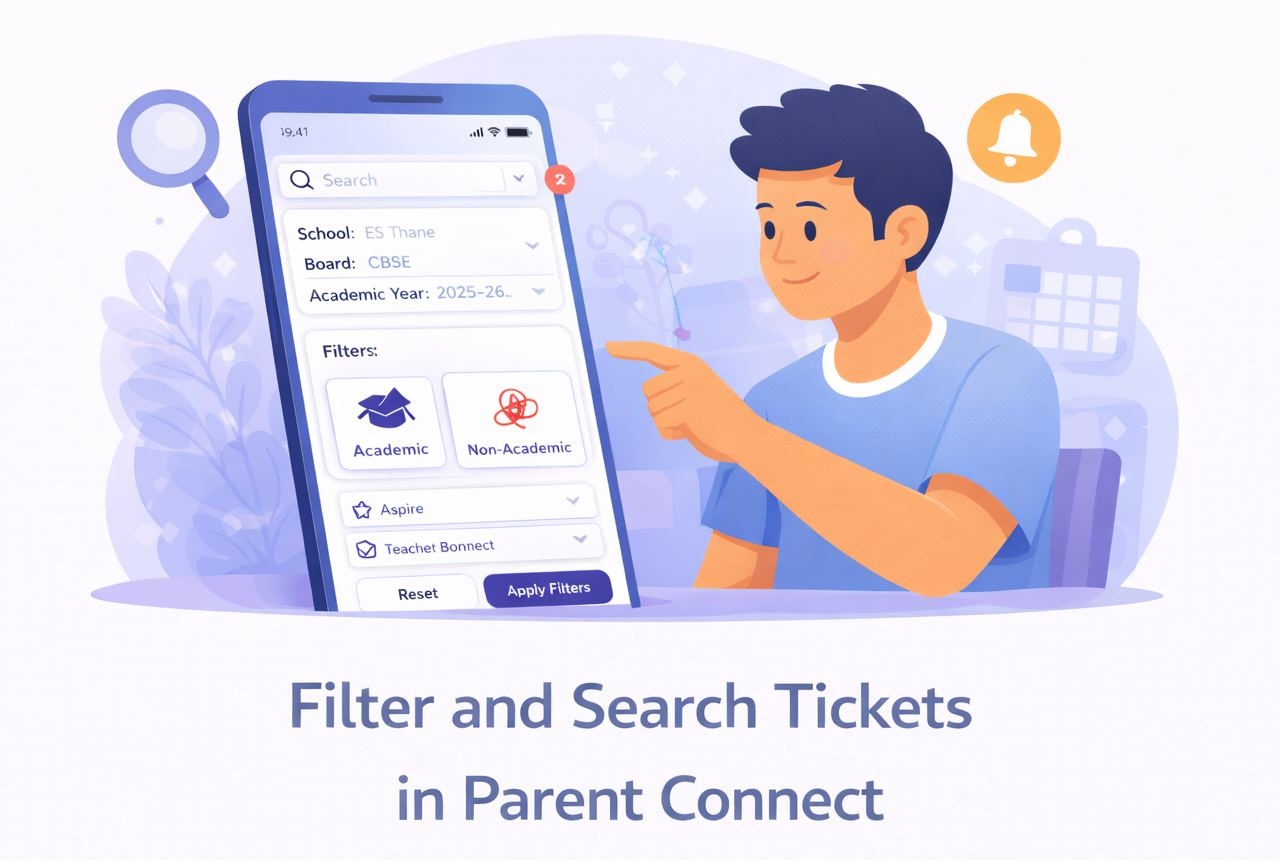
Filter and search tickets in Parent Connect