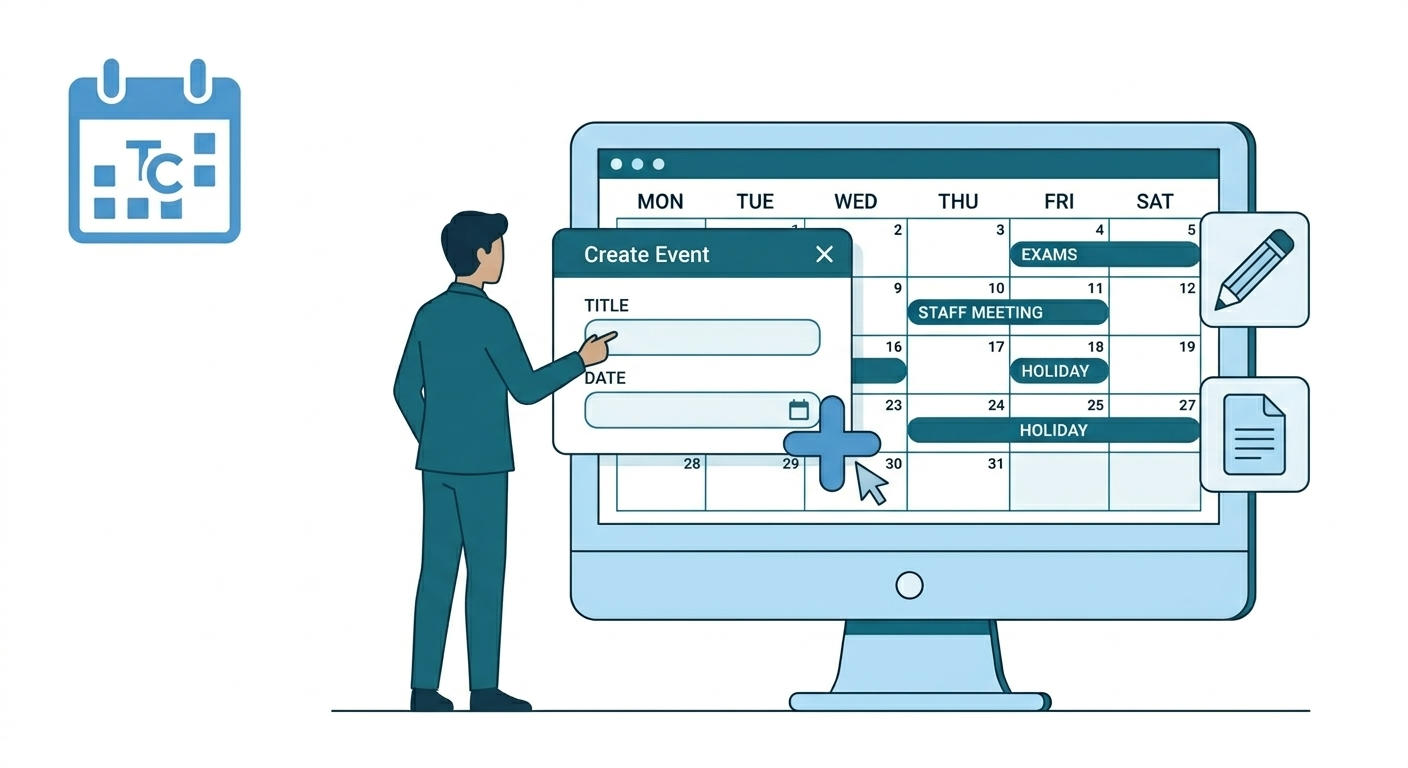
Creating a new event in Almanac is the primary method for broadcasting essential academic and institutional dates to your school community. By utilizing the web-based creation suite, authorized administrators can build highly targeted entries—ranging from single-class exams to school-wide holidays—by defining specific audiences through advanced filters such as Board, Grade, and Division. This centralized process ensures that once an event is confirmed, it is instantly mapped to the personalized dashboards of relevant teachers, students, and parents, maintaining a synchronized and reliable schedule across both web and mobile platforms.
Almanac is the centralized academic calendar module within the K-12 LMS. It provides a structured and reliable source of information for all school-related events, including academic activities, examinations, holidays, vacations, and institutional events.
Role & Platform Matrix
Access to Almanac features is determined by your user role. Please note that administrative tasks, such as creating events, are currently restricted to the web platform.
| Role | Web Access | Mobile Access | Create/Edit/Delete | View |
| Super Admin | Yes | No | Yes | Yes |
| HO Admin | Yes | No | Yes | Yes |
| School Admin | Yes (View Only and Personalised to LMS mapping) | No | Yes | Yes |
| Teacher | Yes (View Only and Personalised) | No | No | Yes |
| Parent | Yes (View Only) | Yes | No | Yes |
| Student | Yes (View Only) | Yes | No | Yes |
School Admins and Teachers see events personalized to their specific LMS mapping and assignments.
How to Create an Event
To ensure accuracy across the LMS, creating events must be done via a web browser. Follow these steps to add a new activity to the calendar:
- Navigate to Almanac: Open the LMS on your computer and go to School Management > Almanac (Web).
- Initiate Setup: Click the Add Event button.
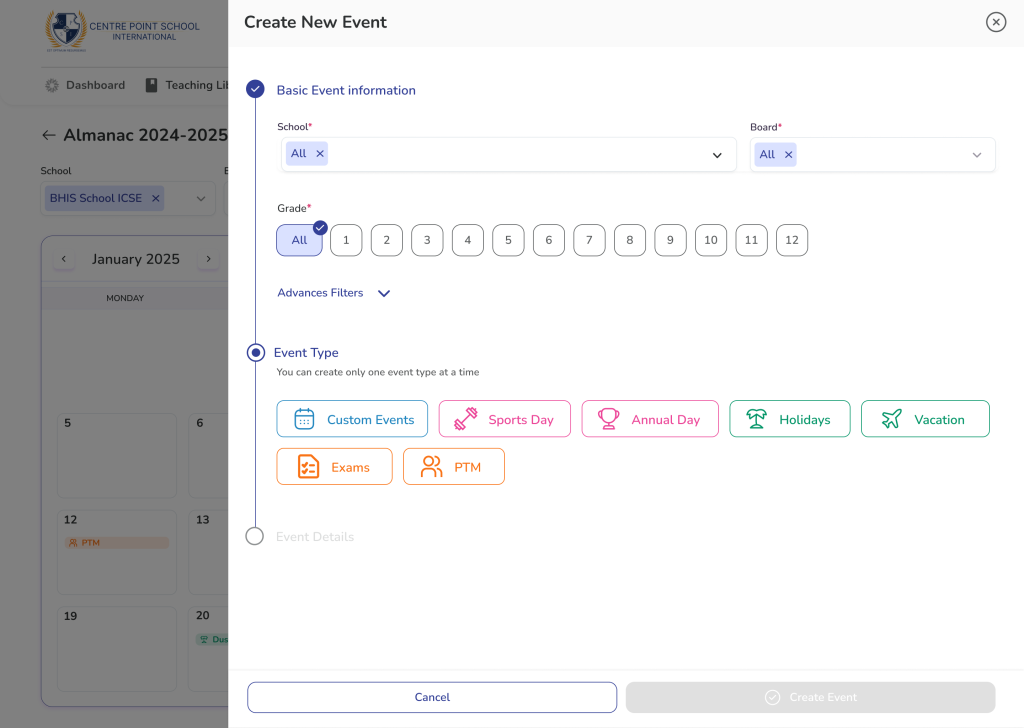
- Define Your Audience: Select the scope of the event by choosing the relevant School, Board, and Grade.
- Optional: Use Advanced Filters to narrow the audience down to specific Divisions or individual Students.
- Fill required fields:
- Audience
- School
- Board
- Grade
- Advanced filters (Optional)
- Division
- Students
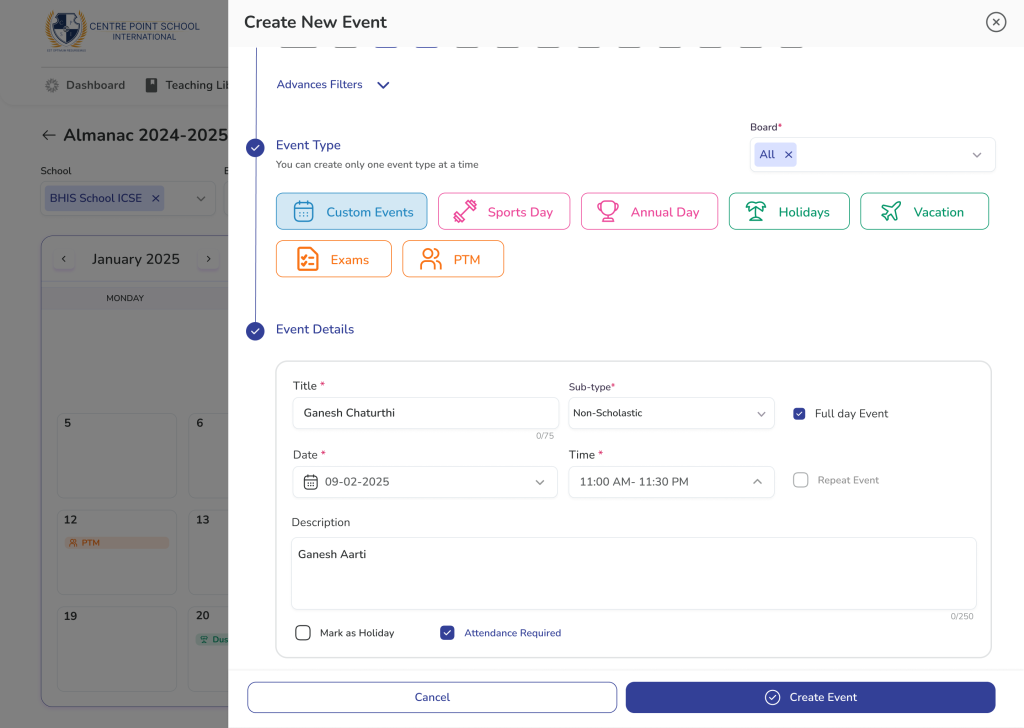
- Event Type Selection (Custom / Sports Day, Annual Day, Holidays, Vacations, Exams, PTM)
- Event Details:
- Event Title
- Subtype
- Full day event (Y/N)
- Date range
- Time Range (if not full-day)
- Mark as Holiday (Y/N)
- Mark attendance (Y/N)
- Audience
- Finalize: Once all mandatory fields are complete, click Create event.
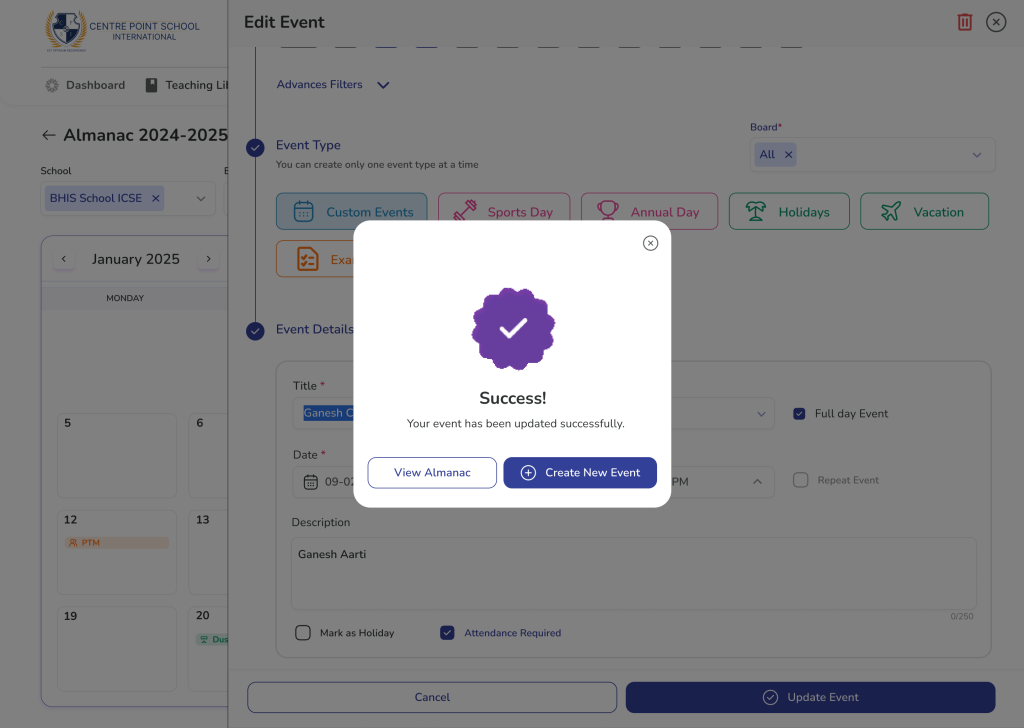
- Confirm: Click Confirm on the pop-up notification to publish the event to the calendar.

Web-Only Creation: Event creation and management tools are not available on the mobile app. To add or modify the academic calendar, you must log in via the web portal.
Frequently Asked Questions (FAQs)
Yes. Use the Advanced Filters during the creation process to select a specific Division. This ensures only the relevant students and teachers see the event on their personalized calendars.
Marking an event as a holiday typically designates that day as non-instructional. This status is reflected on attendance reports and student/parent dashboards to indicate that school is not in session.
The Create event button only becomes active once all mandatory fields (marked with an asterisk) are filled. Double-check that you have selected an Audience, Event Type, and Date Range.
Yes. While parents cannot create events, any event you publish on the web version of Almanac syncs instantly to the parent and student mobile apps.
Yes. Ensure the Full day event toggle is set to No. This will open the Time Range fields, allowing you to set specific start and end times for the activity.