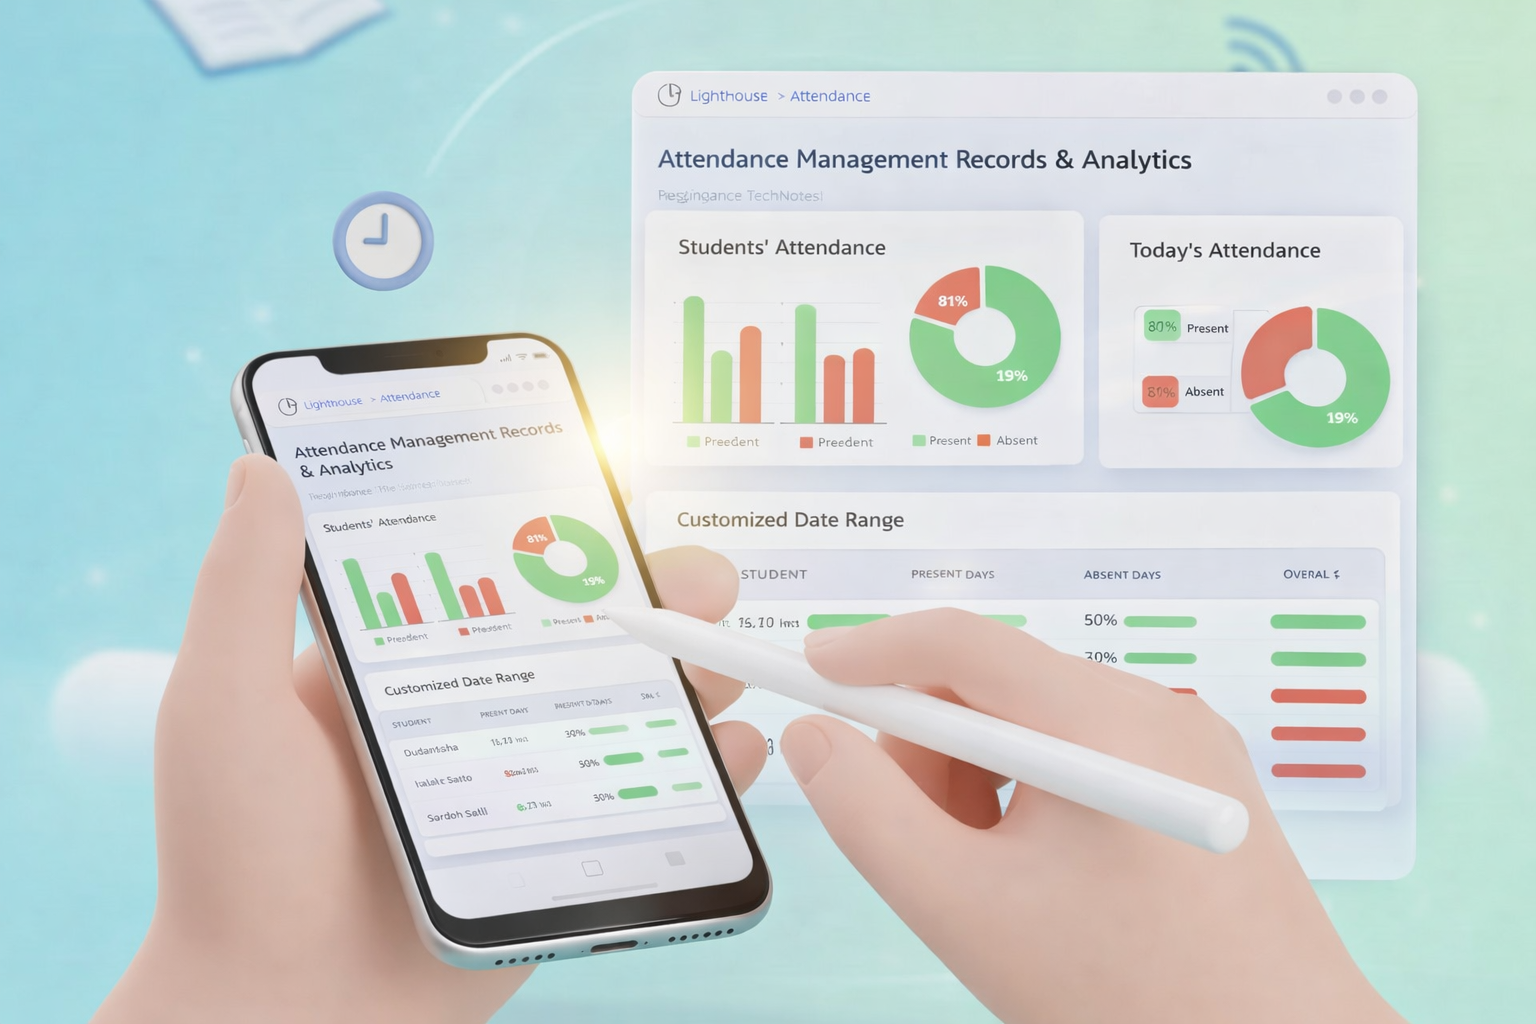
The Attendance module in the Teacher App is designed to simplify daily record-keeping. Teachers can quickly log presence, track late arrivals, and instantly notify parents, ensuring accurate student data is maintained across the LMS.
Academic Attendance marking is a core responsibility for teachers and academic staff. While records can be viewed on the web, the Mobile App is optimized for real-time classroom use.
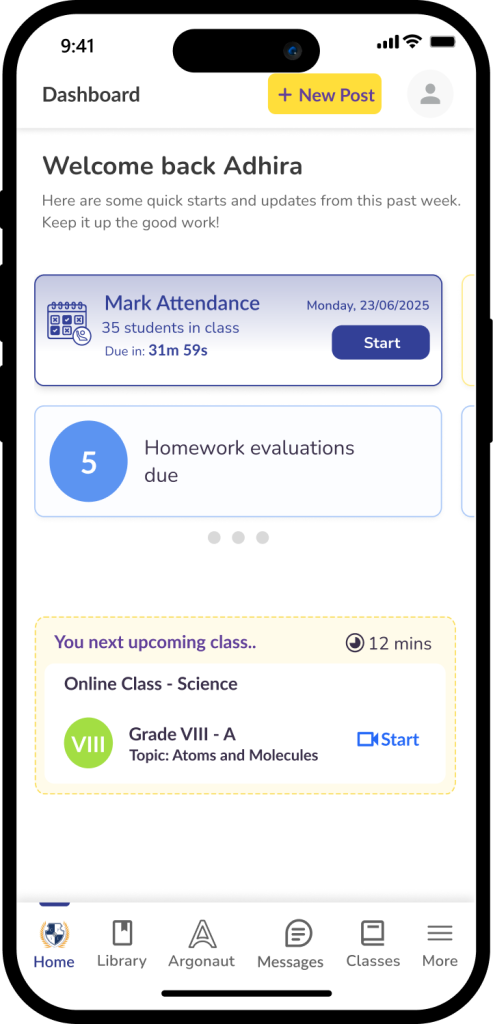
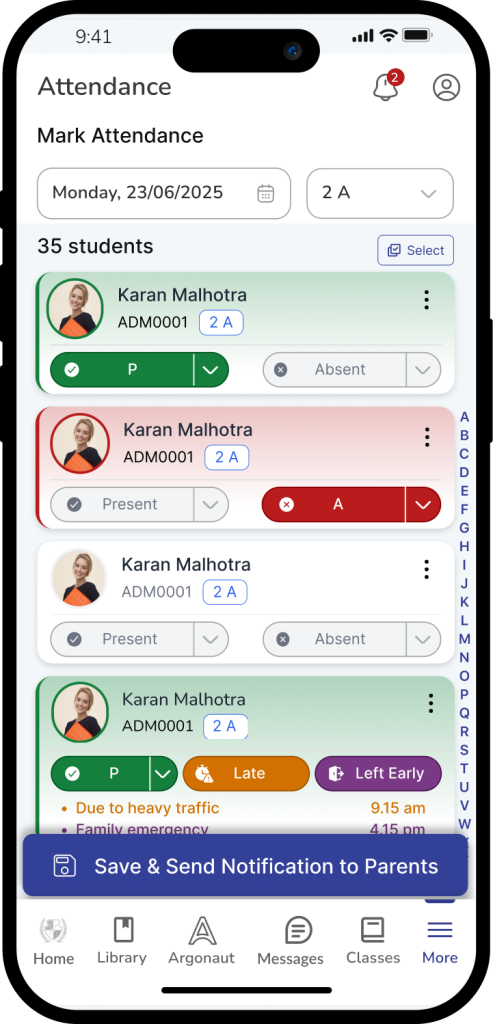
How to Mark Attendance
1. Access the Attendance Module
There are two ways to start:
- From the Dashboard: Look for the Attendance Reminder Card. It displays your class size, progress, and the time remaining to submit. Tap Start or Continue.
- From the Menu: Tap More in the bottom navigation and select Attendance.

2. Set the Context (Class and Date)
By default, the app loads the Current Date and your Assigned Class.
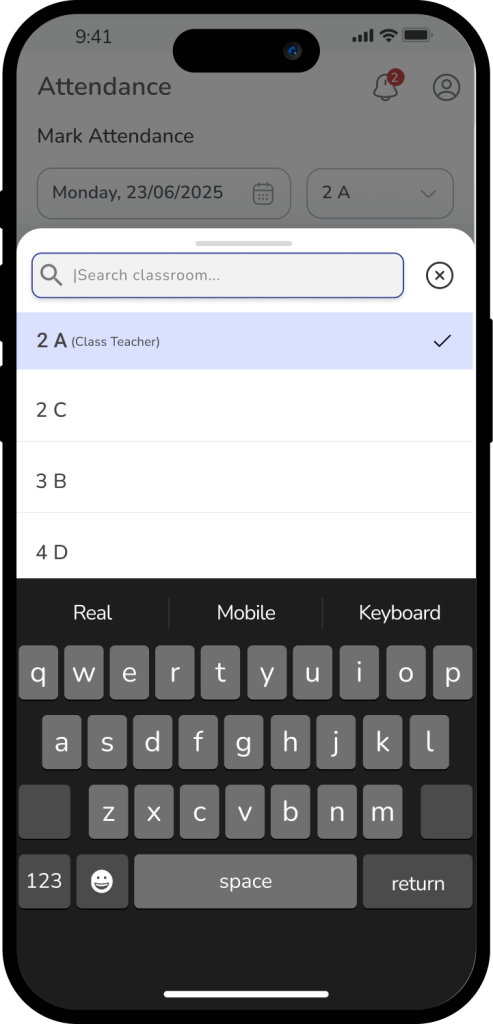
- Change Class: Use the Class Dropdown at the top if you manage multiple sections.
- Change Date: Tap the Date Field to select a previous date from the calendar to record backdated entries.
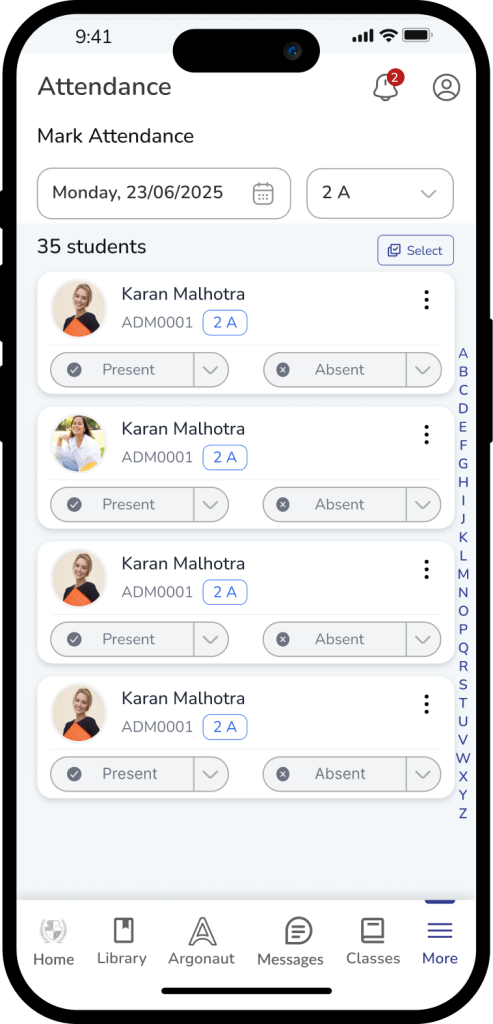
3. Record Student Status
You can mark students individually or use time-saving bulk tools:
- Individual Selection: Toggle between Present, Absent, Late, or Left Early for each student. You can also add specific notes for administrative records.
- Bulk Mark: To save time, use the Select All option to mark the entire class as Present, then manually update only the few students who are absent or late.
4. Save and Notify
Once the list is accurate, tap Save & Send Notification to Parents. This action performs two tasks simultaneously:
- Saves the data to the secure school database.
- Triggers an instant alert to the parents of any student marked with an updated status (like “Absent”).
Important Information
- Daily Requirement: Attendance should be recorded during the designated morning window to ensure parents receive timely notifications.
- Corrections: If you make a mistake, you can return to the module at any time during the day to update a student’s status.
- Transparency: All saved records are stored securely and can be reviewed by school leadership for official reporting.
Frequently Asked Questions (FAQs)
Simply open the Attendance module again, select the student, and change their status from “Absent” to “Late.” Be sure to tap Save & Send Notification again to update the system and inform the parents.
You can typically select the statuses offline, but you must connect to Wi-Fi or cellular data and tap Save for the data to sync with the school server and for notifications to be sent.
Yes. Saving any status other than “Present” (unless configured otherwise by your school) will trigger a notification to ensure parents are aware of their child’s current status.
Next to each student’s name, there is a Notes icon. You can type details there, such as “Parent called in sick” or “Attending school event,” which will be visible to administrators.
Use the Bulk Mark feature. Select the “Present” checkbox at the very top of the list to mark everyone at once, then simply scroll down and uncheck the 2 or 3 students who are actually absent.
Yes. Tap the Date field at the top, select the missed date from the calendar, and record the attendance as usual. Note that some schools may “lock” dates after a certain period.
This means you haven’t clicked the final Save & Send Notification button. Even if you have selected statuses for every student, the record is not official until you save it.